So you’ve finally decided it’s time to open up a Facebook business page. You know it will be good for business, but you have no idea where to start. Well, stop procrastinating—Let’s Go!
(Note: you need to register and have a personal profile set up on Facebook before you can create a page. Make sure you are signed in with your personal profile before you begin the process. Thank you, Norma from Stormy's Unique Creations for this helpful bit of info)
Step 1)
Go to the ‘Create A Page’ on Facebook. How handy is that! The link is right here:
Step 2)
Choose a Category. The Artist, Band, or Public Figure is the easiest one to set up, but take a look at the other options to see what works best for you. Just avoid the ‘Community or Cause’ category. This category does have its place, but this isn’t it. I have mine in the “Local Business or Place/Business Services”. You can edit this once your page is set up.

Step 3)
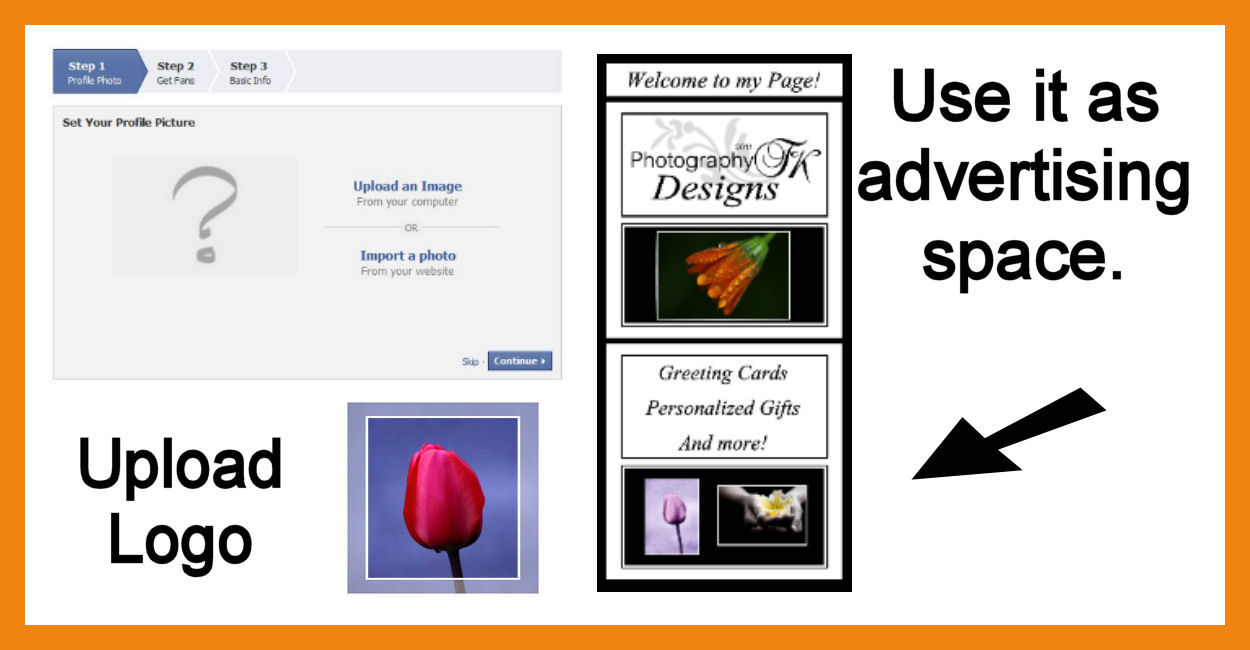
Upload your profile picture. You can go with a simple photo. Or better yet, this is a great spot to advertise yourself and your business. Use a longer image to get the banner look. (UPDATE: This feature is no longer available. Now FB has Cover Photos. You can have writing on them, but not more that 20% of the area.)
Step 4)
Get fans and fill in your info. You can skip step 2 for now, it won’t hurt anything. If you don’t quite know what to say about yourself in step three, just be brief. You can always go back and change this once your page is set up.

Step 5)
You’re all set up! First thing to do is become your very own fan. Click the “like” button—or not—It’s up to you. See that wasn’t so hard!

Now you can click the “Edit Page” button in the upper right hand corner of your page. Before you do anything else, open up the ‘Manage Permissions’ tab to the left of the screen. Find ‘Default Landing Tab’ and choose the page you want new fans to see when they first discover your page. Generally this will be either your wall or your info page. Once you’re comfortable running your page you can set up a Welcome tab for people to land on, but that’s for later.

Take your time to explore all the options and customize your page the way you want it. All that’s left to do is build your fan base. Once you reach 25 fans you can get a personalized user name instead of having all those pesky numbers following your URL.

You’ll be able to change your URL from this:
http://www.facebook.com/pages/photographytkdesigns/266013910080267
To this: http://www.facebook.com/photographytkdesigns (shameless promotion here! Click on the link and come be my 'fan'!! )
When you get to this point, choose your username carefully. It cannot be changed.
If you found this tutorial helpful and have taken the plunge and set up a business page, feel free to leave a comment on this post with a link to your new page so that others can become your fan.
NOTE: When you become a fan of someone’s page, use both your personal profile and your business page if you have one. ‘Liking’ with your personal profile gives the page owner a new fan (numbers seen on the left of the screen). And ‘liking’ with your business page is a benefit to both of you because it gives other fans a link back to your page as well. It’s win/win!
Now time to go and delete the new page
I just set up to create this tutorial! LOL
For helpful tips on harnessing the power of Facebook to promote your business, read my guest blog post from the GCU Community Blog by Corrie Kuipers: Harnessing the Power of Facebook
Wow! You rock. I needed this a few days ago! :)
ReplyDeleteExcellent tutorial, Tracie! The screens shots really clarified what to do for those not familiar with Facebook.
ReplyDeleteRosanne
Just what I've been wondering how to do!
ReplyDeleteThanks a million!
An excellent tutorial, Tracie. I love the screen shots and helpful instructions you featured here. I'd like to add that the maximum image size for any Facebook page is 180x540px which is quite big and it can be used to promote your products more effectively.
ReplyDeleteThanks for sharing!
Marta
FANTASTIC! Thank you!
ReplyDeleteThanks for this wonderful post!
ReplyDeleteThanks for sharing all this wonderful information with us.
ReplyDelete